

How To Draw Trees With Pen
Welcome to the definitive guide to drawing trees. This page features four in-depth lessons on how to draw trees using various mediums and approaches.
Use the table of contents beneath to skip to the lesson of your choice or go through each lesson chronologically.
Lesson 1: How to Draw a Tree with Pencil (Graphite)
In this lesson, we'll explore a structured arroyo to drawing a realistic tree with pencil. The arroyo that I'll share with you can exist applied to any species of tree and can even be adapted to cartoon bushes and shrubbery. In this approach, we'll examine specific aspects of the tree and apply what is observed to the drawing.
You're likely to notice the about success drawing a tree from observation, but you tin can also apply this method to drawing a tree from your imagination.
What Yous'll Need...
In this example, we'll draw the tree using graphite pencils. Three pencils are used, but the pencils that you may use are dependent on the pressure that you lot typically place on the pencil. Ultimately, you lot'll need to create a full range of value in the cartoon. For this reason, a range of graphite grades are used.
- 2H Pencil - Used for establishing the shapes. (Too much pressure with this pencil could create depressions in the surface of the paper.)
- HB Pencil - Used for developing the mid tones and the lighter values.
- 4B Pencil (or equivalent) - Used for developing the darker values.
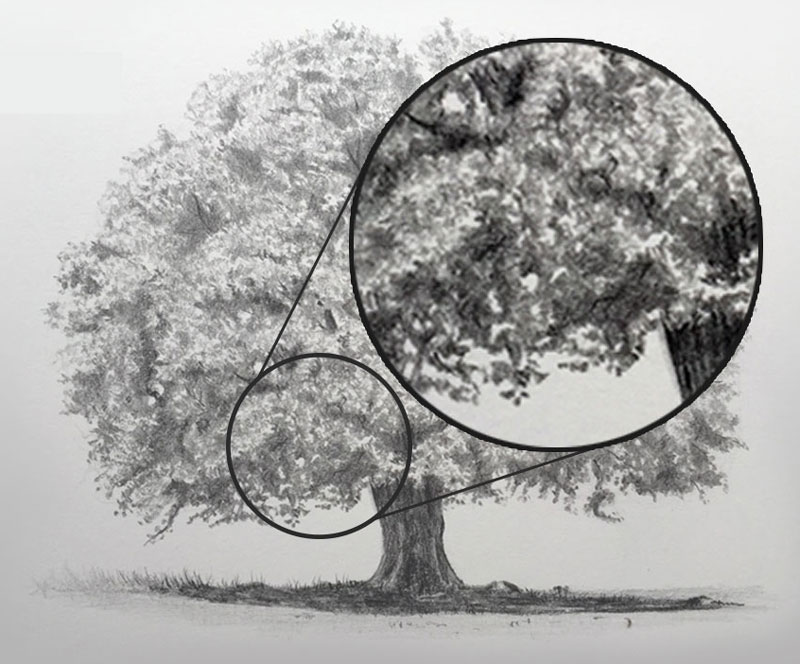
Since texture will play an important role in the cartoon, the surface that y'all choose to work on is of import. For this example, Bristol paper (vellum surface) is used. This newspaper is very smooth, but still has an ample tooth (texture) to accept multiple applications of graphite.
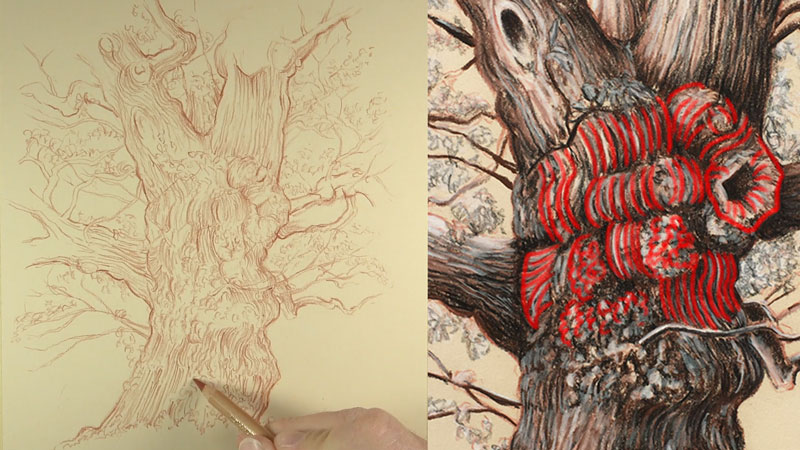
Bristol paper provides a good corporeality of control over the marking, simply the texture in the cartoon must be developed through marker-making and value alone. (Particular of texture created on Bristol newspaper is pictured beneath left.)
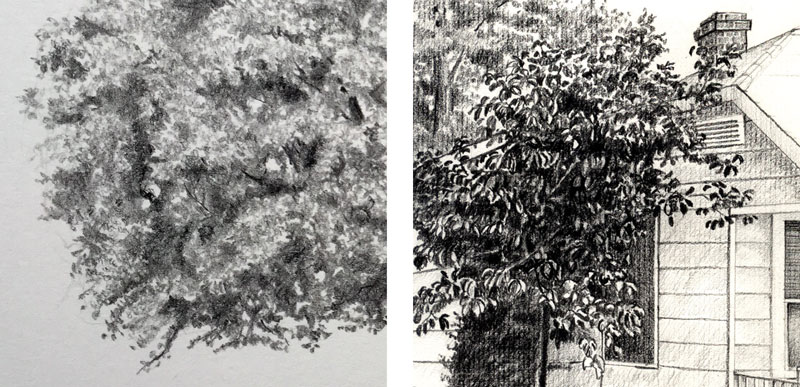
Some volition adopt a paper with a greater texture. Working on a surface with a bit more molar can aid in the development of the texture of the leaves. Charcoal newspaper is a good solution for those wanting to exploit the surface texture. (Detail of texture created on charcoal paper is pictured above correct.)
Keys to Drawing Trees
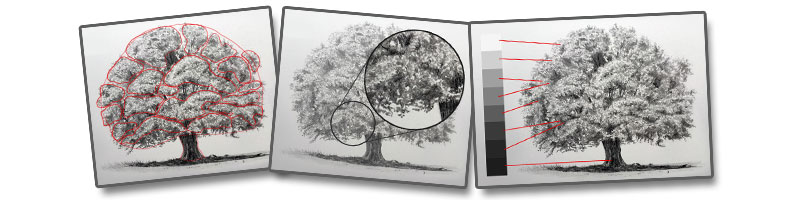
It'south easy to become overwhelmed when yous look at a tree. In that location are so many details! But to describe one accurately, we need not exist consumed with these details. Instead, we'll breakup the tree into three simple aspects. We'll develop each aspect individually, following a structured arroyo.
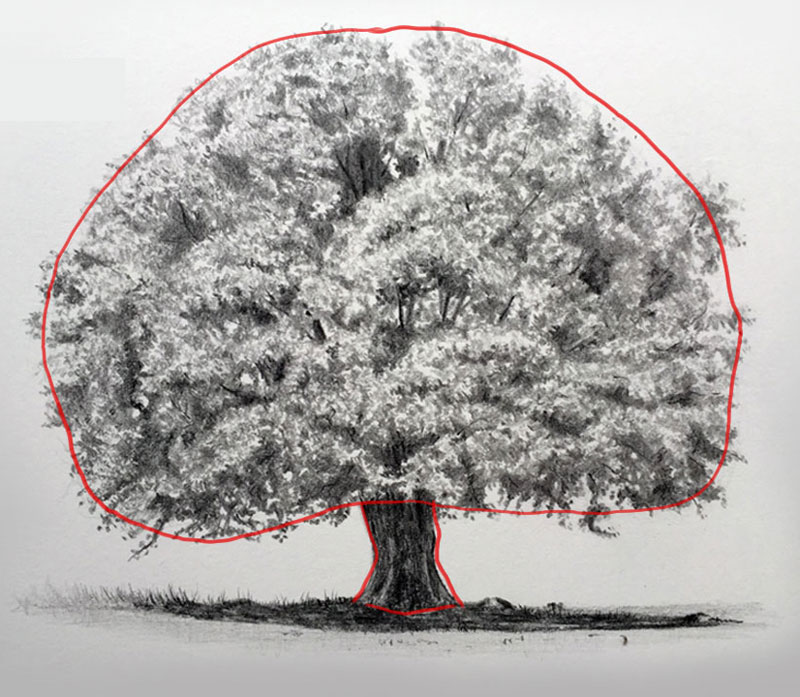
Step i - Find the Shape(s) - The first thing we'll do is define the overall shape of the tree. Drawing lightly with the 2H pencil, we'll concentrate only on the outer contours.
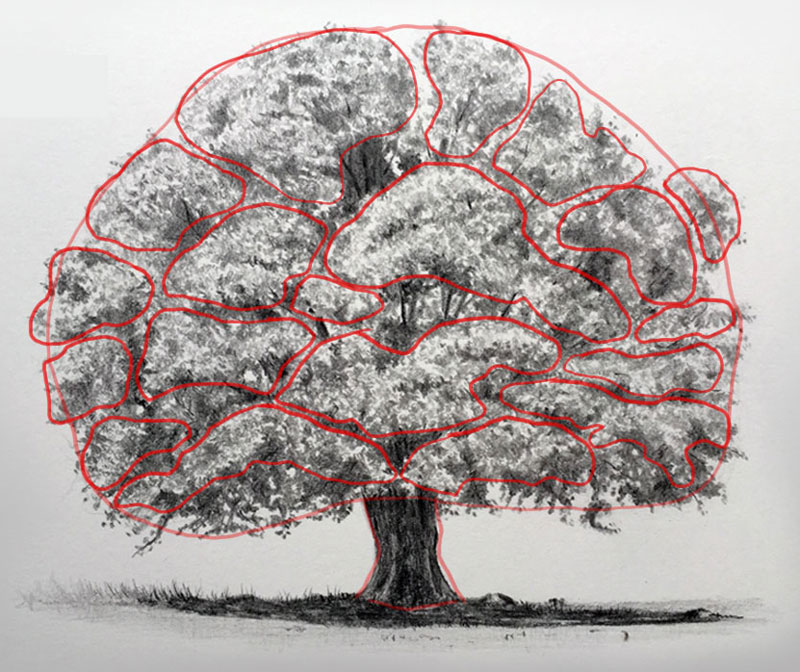
With the outer contours defined, we'll next find the smaller shapes within the canopy of the tree. These locations are "clumps" or collections of leaves found at the terminate of the branches.
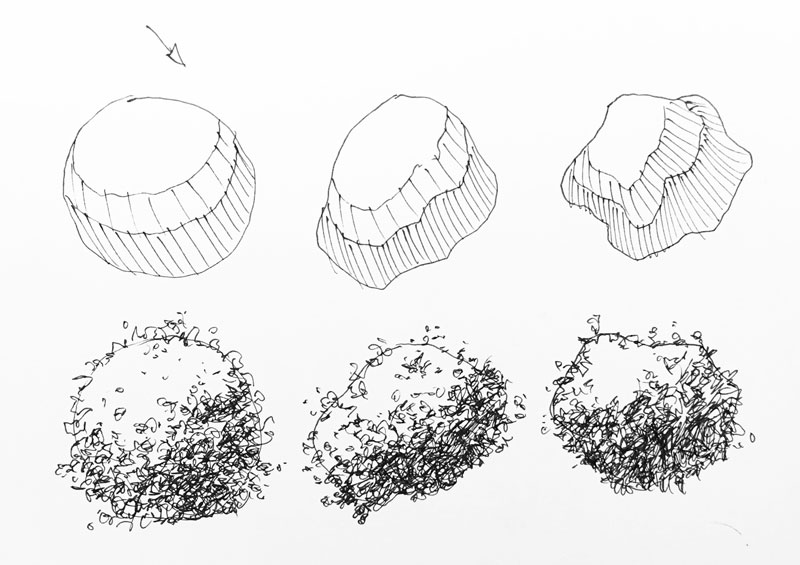
Step ii - Develop the Texture - Using the defined shapes as a guide, nosotros'll start to develop the texture of the leaves. This process requires patience. Take your fourth dimension and remain consistent. It is not necessary to draw every leafage, instead we'll create the illusion of collections of leaves. We'll recollect almost each "dodder" or collection of leaves equally a form, developing the highlights and shadows on each.
Organic collections of lines can exist used to create the illusion of the texture. These lines may be small squiggles that overlap. Be sure to exit an organic and irregular edge around the outer contours of the tree and get out small open spaces within the canopy.
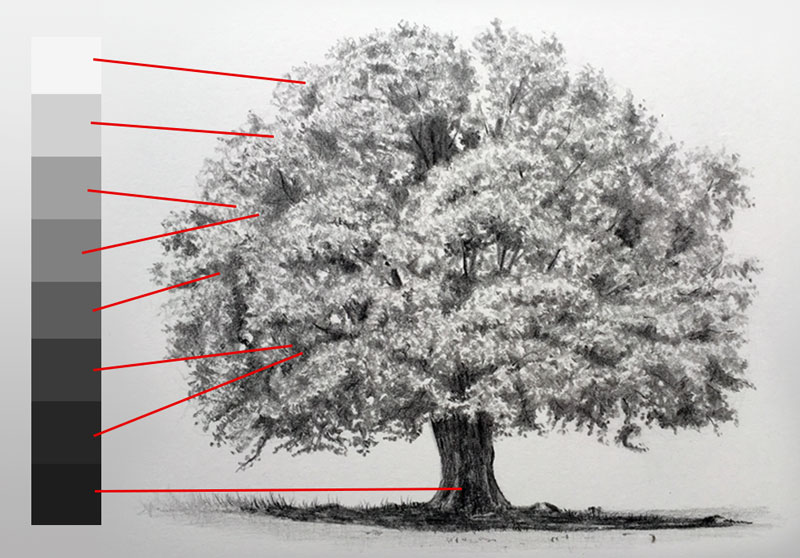
Step three - Develop the Value - The illusion of texture is created not only by the marks that are made, but also through the development of the values. Value is the darkness or lightness of a color. Information technology is responsible for communicating non only the lite within the scene, merely also the form and texture of the object. Our goal is to create a total range of value, including the darkest "darks" and the lightest "lights".
Additional Considerations
1. Take Your Time - Equally mentioned earlier, drawing a realistic tree requires patience and persistence. (This is really true for any subject field that you depict.) Far too many people believe that cartoon should be quick and piece of cake. Sometimes just "slowing down" and patiently developing the drawing leads to considerable improvement.
2. You Are Creating an Illusion - Cartoon is an human action of illusion. It is the development of the shapes, textures, and value that create this illusion. There's no need to depict everything that you see. Instead, concentrate on how you can create the illusion of what you run across.
3. Deviations are Adequate - When drawing from observation, deviations from the original reference or subject are inevitable. Creating an verbal copy of your subject probably shouldn't be your goal. Don't put unnecessary pressure on yourself to be "perfect". This volition only pb to frustration.
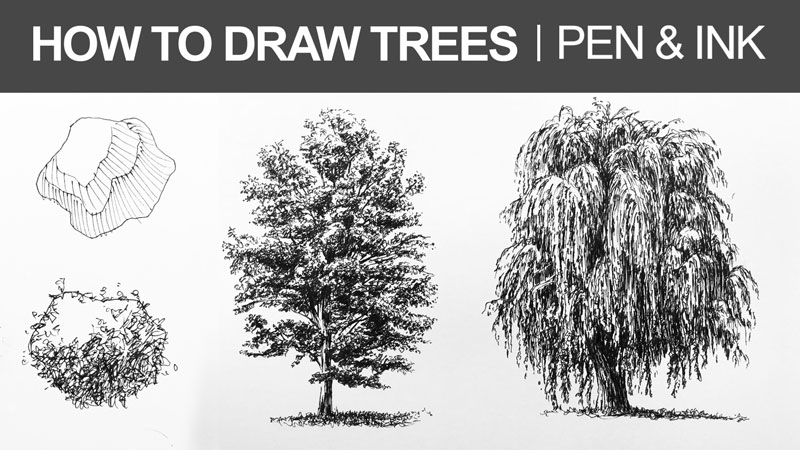
Lesson Ii: How to Draw a Tree with Pen and Ink
Bones Elements to Consider When Drawing a Tree
When we create a drawing of a tree with pen and ink, we'll consider the aforementioned basic elements. Recall, the details that nosotros see - the leaves, branches, and body can all be simplified, making the illusion that we create in a drawing a flake more manageable. When we draw, nosotros create an illusion - not always an exact re-create of what nosotros see.
Merely like with graphite drawing, creating this illusion in a pen and ink drawing tin be achieved by focusing on three cardinal elements:
- Shape
- Form
- Texture
The following video demonstrates how to draw a tree with pen and ink past focusing on these 3 basic elements.
Recognizing the Shape of the Tree
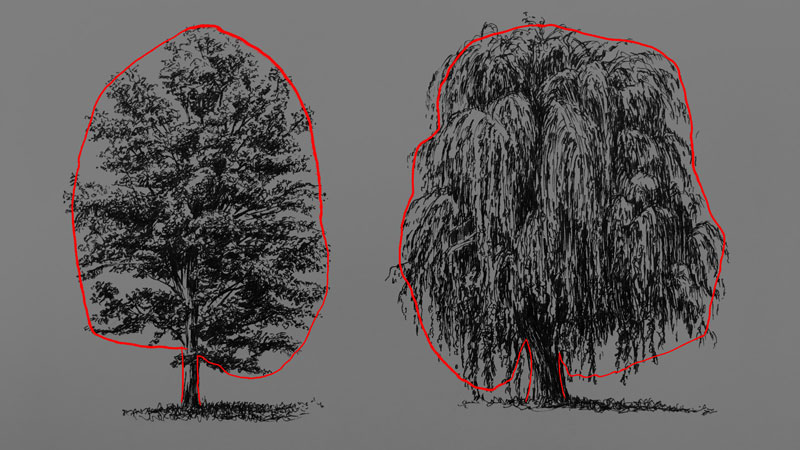
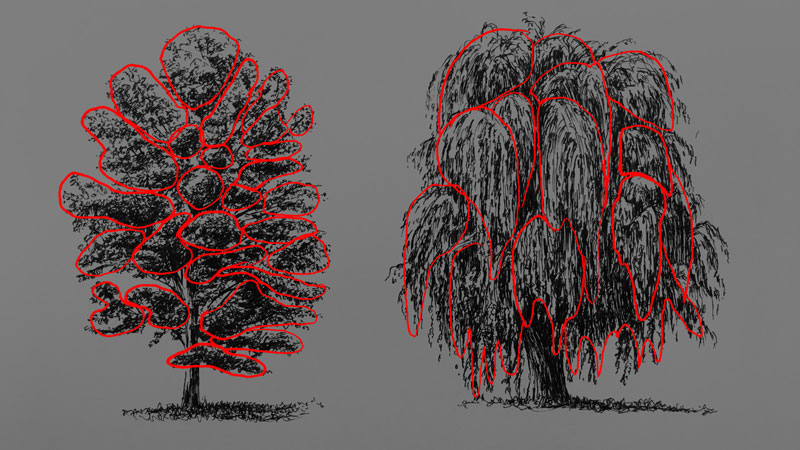
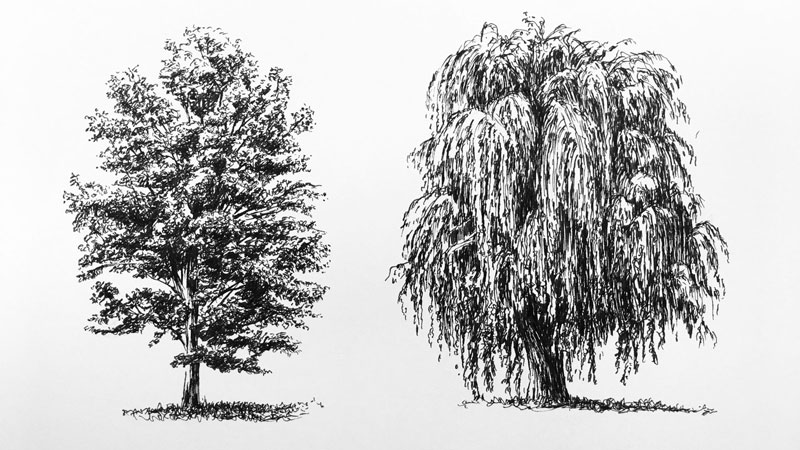
Trees are conspicuously organic subjects and the shapes that they create are besides organic. The showtime thing that we need to recognize is the overall shape of the tree which will vary based on the blazon of tree that you are drawing.
To recognize the shape of the tree, look at the overall profile of the shape. If yous struggle with seeing this, try squinting your optics - blurring out the details. Look at the outer edges of the tree and simplify what you lot are seeing into a line that can be enclosed.
This overall shape can exist loosely sketched with a graphite pencil. Apply a light touch then that the graphite can be erased easily once ink applications have been made. Make comparisons betwixt your drawing and what you are seeing and make any necessary changes.
Finding the Shapes Within the Tree
With the basic contour in identify, nosotros can brainstorm to locate smaller shapes that happen within the torso of the tree. Trees are made upwardly of collections of leaves and branches that extend from the torso. These collections of leaves and branches are forms but before we develop the illusion of these forms, nosotros must recognize the bones shapes that they create.
Again, these basic shapes tin be lightly sketched with a graphite pencil. We aren't concerned with the details of the leaves at this betoken. Instead, we just want to simplify the collections of leaves into basic shapes. The shapes that you draw will again vary based on the blazon of tree that you are drawing.
If you detect that recognizing these basic shapes is hard, try looking for areas of contrasting values. Typically, darker values are found on the lower portion of each shape with lighter values on the acme.
Creating the Illusion of Course
Now, we demand to create the illusion of form. In social club to create this illusion, nosotros'll need to consider the low-cal source and add darker values in locations of shadow while leaving areas of lighter value in locations of highlight. The central to creating the illusion of form with any bailiwick lies in the locations of value.
For each of the smaller shapes that nosotros drew in the last step, nosotros'll add darker values in the locations of shadow. These areas of shadow be mainly on the contrary side from where the light source originates. And similar with bones forms, at that place will be a gradation of value from light to dark, creating locations of midtone. Since these forms are irregular, the locations of shadow and middle values are also irregular.
These values are added and developed through textural marks that resemble the texture of the leaves. Textural marks are more than concentrated in locations where the value is darker and more sparse in areas where the value is lighter.
Adding Texture to The Tree with Pen and Ink
When drawing with pen and ink, the values that are created are mostly dependent on optical mixing. Since every marker is dark, fifty-fifty when applied with lite pressure level, we must rely on the white of the paper to affect the perceived value. This is important to remember since we are building up the value as we develop the texture.
Information technology's like shooting fish in a barrel to become focused on each individual leaf when cartoon a tree. But in our drawing, we don't need to draw every unmarried one. Instead, we need to mimic the texture that is perceived. Surprisingly, this tin can exist accomplished with very loose marks with pen and ink.
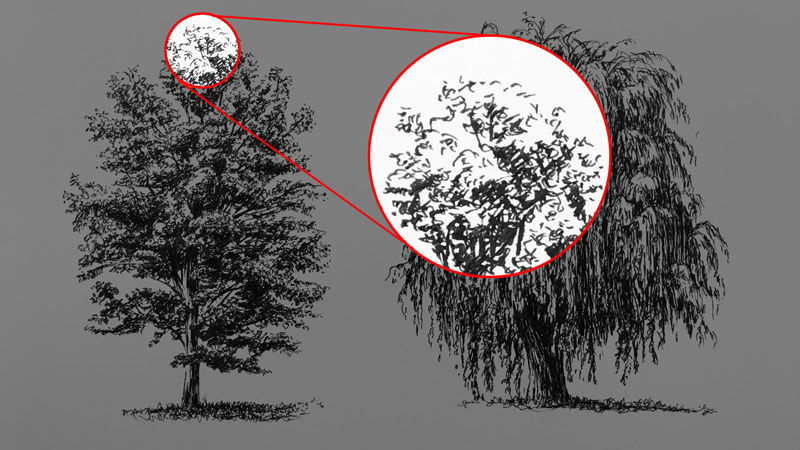
With many species of trees, small squiggly lines fabricated with the pen can create a convincing texture.
No matter what type of pattern you make up one's mind to use for developing the texture, it's important to stay consistent. Make sure that the marks that yous add to the top of the tree are consequent with the marks that are used to describe the middle and bottom of the tree.
Even though loose, squiggly marks event in a believable texture, it doesn't mean that this process is fast. Take your time and patiently develop each section. Have breaks if necessary. Working slowly volition pay off in the cease.
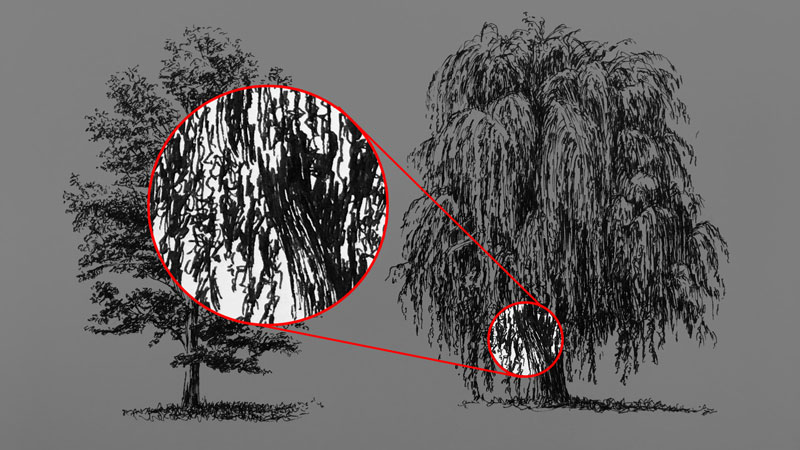
Directional strokes tin be used to develop the texture of the trunk of the tree. Once again, we can concentrate these marks in areas of shadow and allow them to become more thin in areas where calorie-free is striking.
Even a subtle change in the textural marks that y'all brand will produce plenty contrast to communicate a different texture in the drawing.
In one case all of the ink applications accept been made and allowed to dry out completely, a kneaded eraser tin be used to remove any of the graphite guidelines that may be visible.
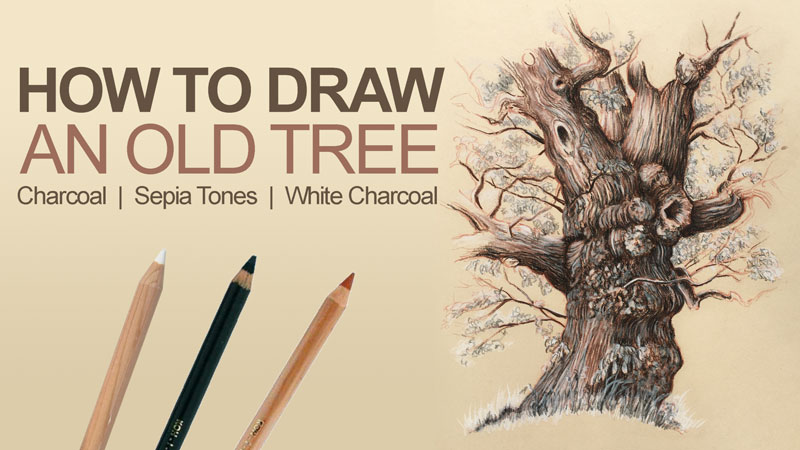
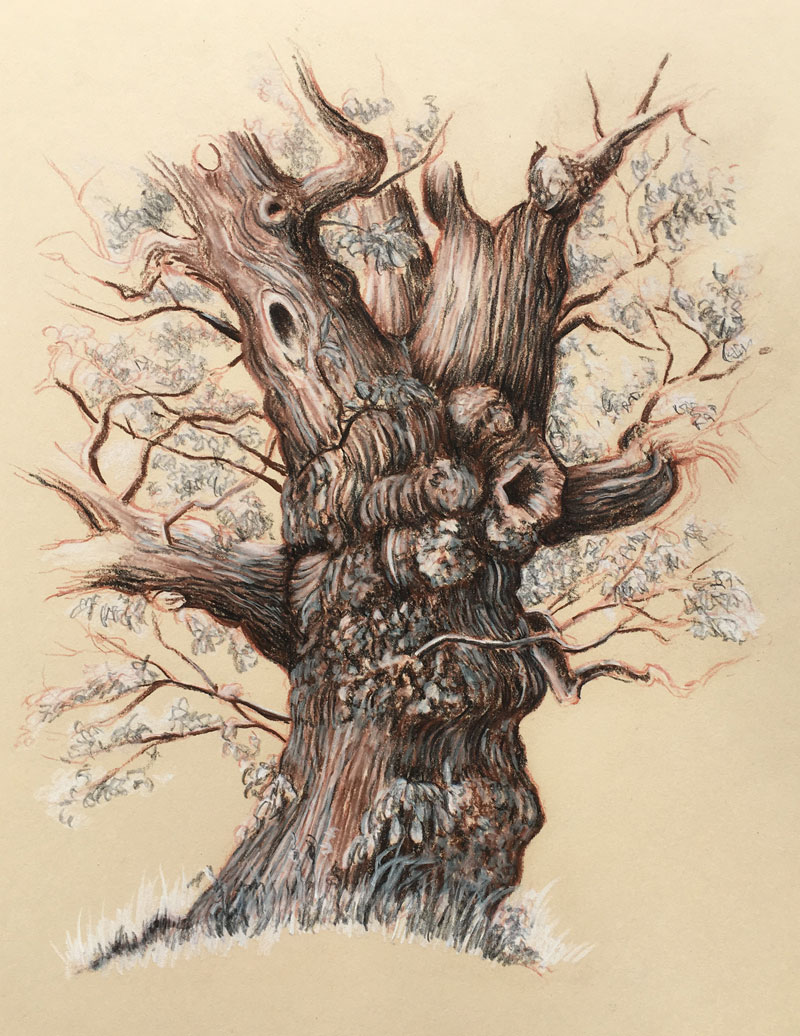
Lesson Three: How to Depict an Onetime Tree with Charcoal
Capturing The Character of a Old Tree in a Drawing
Every living thing has its own personality and trees are no different. Equally artists, role of our duty is to capture the personality of the subject - the graphic symbol of the entity - in our drawings. This can be a daunting task if we allow ourselves to become overwhelmed with details or become as well obsessed with realism. Just if nosotros look for $.25 of visual information that tin be exploited in the class of a drawing, then we're likely to capture the character, resulting in a cartoon that is accurate while notwithstanding telling a visual story.
When information technology comes to trees, the character is often found in the shapes, lines, values, and textures - the same things that we would wait for if our goal was to create a photo-realistic drawing.
The post-obit video demonstrates the procedure of drawing an old tree with charcoal and sepia tones.
Cartoon with Charcoal and Sepia Tones
Charcoal, a blackness powdery medium from burnt organic cloth, and the reddish-brown tones of the color, sepia are a match "made in sky". The earthy tones of any sepia material, whether information technology exist pastel or conte, ally well with the rich darks produced by charcoal. And when you add together a little white charcoal into the mix, a beautiful range of value and colour can be achieved.
What is Sepia?
Simply put, sepia is a range of color from browns to reds. All sepia tones have a bit of bawdy reddish and brownish in them in varying degrees. Originally, sepia ink was widely-used every bit a writing ink in early Greek and Roman civilizations and was also used by artists - perhaps well-nigh famously, by Leonardo da Vinci.
Sepia tones are used in every artistic medium from photography to painting. They can be used equally color enhancements in photos to brand them appear older or every bit underpaintings. The softer tones produced by sepia colors add together a bear on of color to an otherwise monochromatic composition.
Sepia tones are ofttimes used aslope charcoal to soften the strong blacks produced the material. The reddish-browns also add together a scrap of color to the drawing, calculation involvement. Sepia tones are near effective when used for subjects that already have reds and brown in them naturally, such equally portraits and landscapes.
How to Draw an Old Tree Pace past Pace
In this lesson, nosotros're working on toned Stonehenge newspaper (Fawn, Vellum surface). Stonehenge papers are 100% cotton which results in a soft surface. Softer surfaces naturally produce a softer marker which may be preferred by some artists.
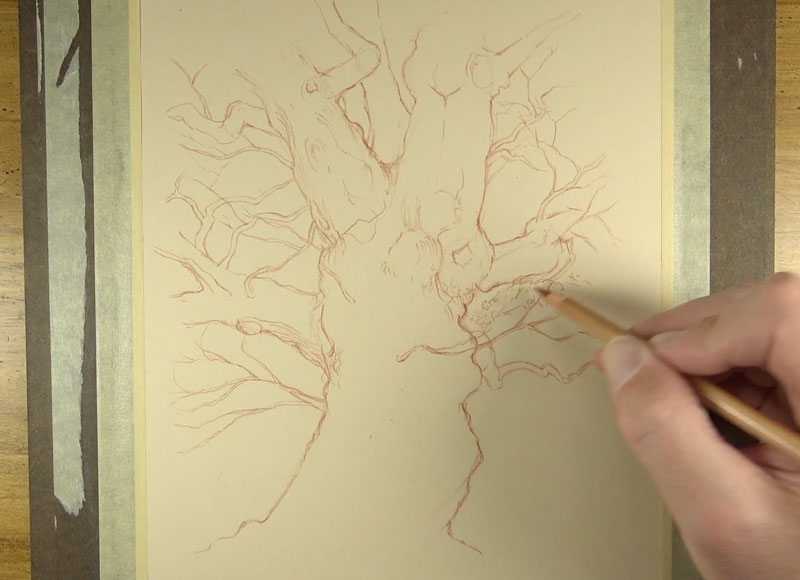
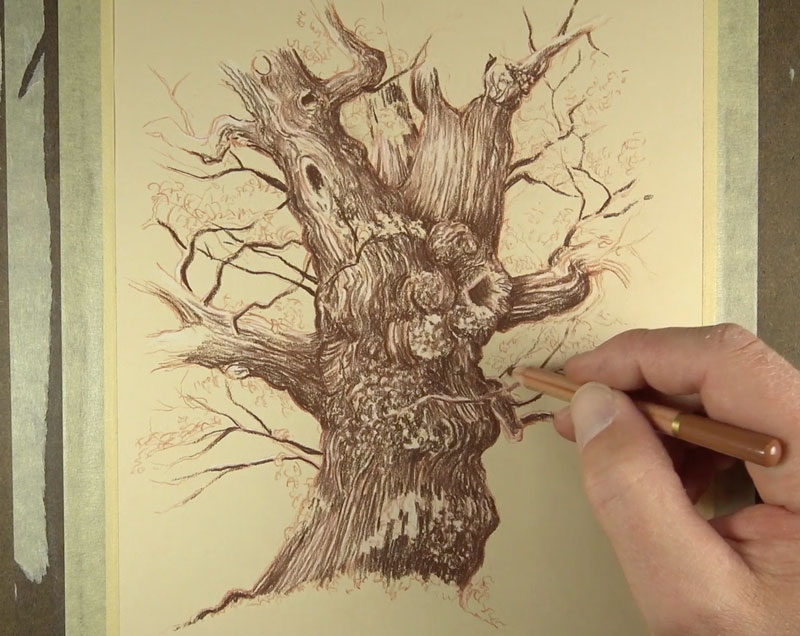
We'll brainstorm by lightly drawing the contours of the tree with a Ruby-red Chalk pencil from the Gioconda pencil line from Koh-i-noor. Although this pencil is labeled as a "chalk" pencil, information technology feels and behaves similar an oil pencil.
The marks at this phase are light and loose equally we try to detect the boundaries of the subject. The near important element at this stage is the cadre of the trunk and the branches of the tree. We'll besides exaggerate the contours a bit, making them bumpier. This will add together some character to the tree and brand information technology appear a fleck older.

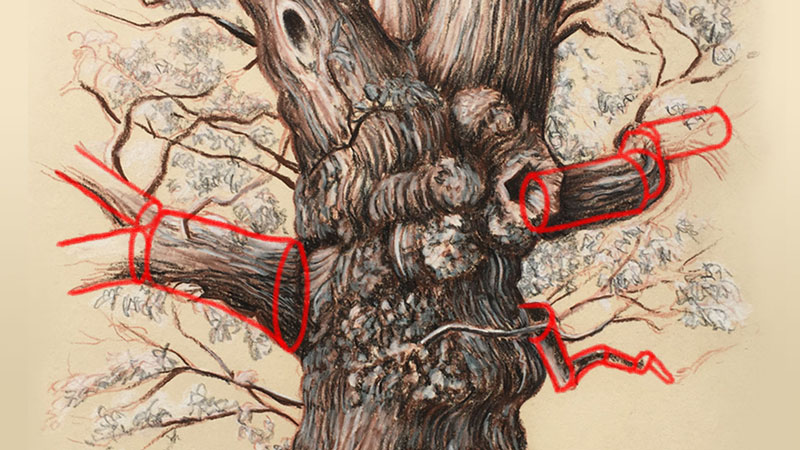
It may be helpful to think of the branches as tubes or cylinders. Information technology's easy to add branches that extend from the edges of the trunk, simply some of these should bend and turn towards and away from the viewer. Cartoon the branches in this mode adds depth.
Once the contours are loosely sketched, we can heighten the line quality. Line quality refers to the thickness or thinness of the line. At that place should exist some variety here. More often than not, portions of the tree that are thicker can be defined by a thicker line. This ways that we tin can revisit the core of the torso and brand the lines that ascertain it a little thicker.
Now that the contours are in identify, we can start to develop the texture on the torso of the tree. By and large, this texture is defined by line applications. The directional lines that nosotros add here are important and should flow with the grade of each section of the tree. Lines that flow over the class of the subject are referred to as "cantankerous contour lines". It'southward important to point out that the texture of the tree changes throughout. In some areas the lines are predominantly directly, while in other locations the lines may be made upward of smaller circles.
Now we're ready to begin addressing the value range. Value is the darkness or lightness of a color. Value communicates the form and texture of the subject. We'll start by applying an application of white charcoal over the majority of the tree. Past doing this, we can preserve the lighter areas before developing the darker ones. The stroke of the marker should be considered hither equally well. Just like in the concluding step, we'll make marks that catamenia with the cantankerous contours.

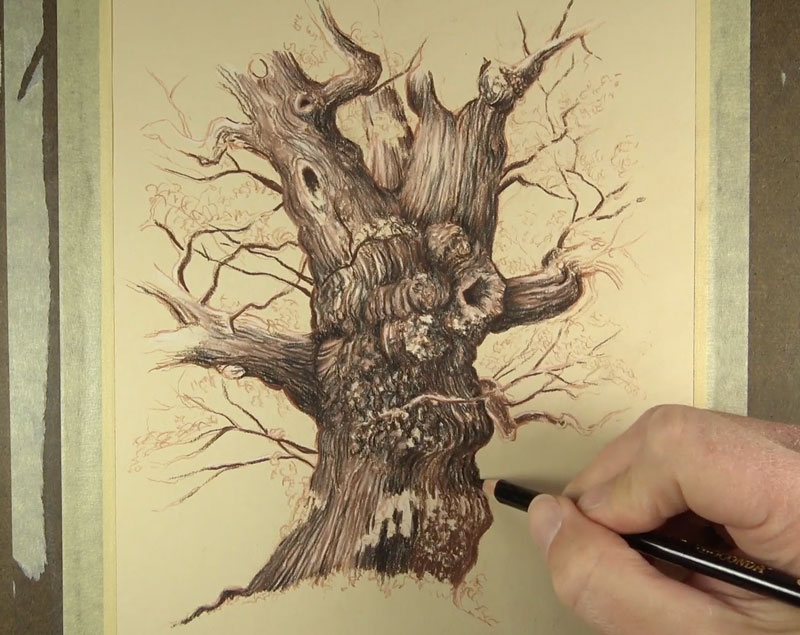
Nosotros'll begin introducing darker tones and midtones with a Sepia Light pencil from the Gioconda line. This pencil is powdery and behaves in a similar manner as a pastel pencil. Since the light source originates from the upper left, darker tones are full-bodied on the right side of the tree. Even so, since the tree is curved, some darker tones are also establish on the left side. Again, strokes applied with the pencil flow with the cross contours.
Before going even darker, the white charcoal pencil can be used to soften areas where the contrast may exist too demanding.
Now nosotros can push the darker tones with a charcoal pencil. We shouldn't comprehend the applications made with the Sepia Lite pencil completely, but instead focus on the locations where the value should be very dark. Once more theses locations exist on either side of the tree, only are more than dominant on the side reverse from the light source.
We can now go back with a sharpened white charcoal pencil and heighten the highlights farther. This broadens the range of value and increases the contrast. Edges are and then refined and blacks deepened using a Negro pencil.
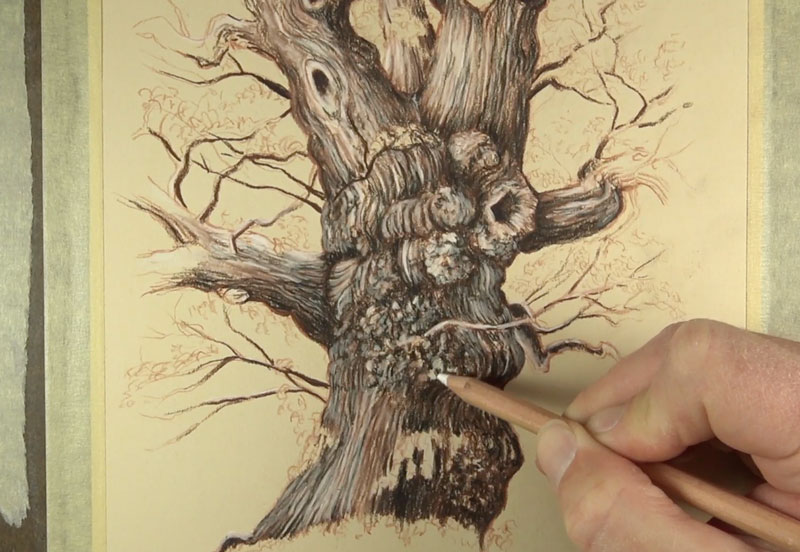
We tin can then make full in loose indications of leaves and grass at the bottom of the tree and throughout the canopy using a combination of the white charcoal pencil and Negro pencil to complete the image.
While the combination of charcoal and sepia tones can be used for any subject, they work all-time when practical to those that naturally contain cherry-red world tones similar our tree. The process is quick without sacrificing much control. And when it comes to drawing trees and capturing their character, focus on the basic shapes, lines, and textures - exaggerating them when possible.
Lesson Four: Drawing Trees with Colored Pencils
Drawing is all about creating an illusion. Nosotros run into the world around united states as lines, shapes, forms, textures, and colors. This is how our eyes see things anyhow. It is our minds that make sense of these things. Our mind tells usa what nosotros are seeing, not our eyes.
Every bit artists, we are in the business of creating illusions. We rely on the style in which our eyes work in order to "fox" the minds of those that view our art.
Problems typically ascend when we permit our minds to get in the way of what our eyes are really seeing.
Although, nosotros are discussing how to draw a realistic tree in this tutorial, this concept of drawing applies to any subject that you lot may want to tackle.
The Importance of Texture
When it comes to drawing trees, texture will play a crucial function. We will need to mimic the observed texture of the leaves of the tree, without cartoon every single leaf. And so, our goal is to create - you guessed information technology - an illusion.
This illusion is created by relationships of value. The positioning of the nighttime and light tones will not only requite form to our tree, but also create the illusion of groupings of leaves. It is the contrast between the darks and the lights that will interpret as individual leaves to our viewers.

Dark values will exist in shadowed areas, while light values will be in areas that are receiving light.

The Colors
Since we are building up the illusion with colored pencils, we volition need to consider the value of the colors that are used. The leaves on the tree in this sit-in are light-green. We'll mix areas on the tree to create lighter and darker values using yellow, blue, brown, black, and white. Not only will this push the value range, but it will also expand the depth in the colour.
The bluish that is used is darker in value, so it is used to develop the shadowed areas of the tree.

Yellow is naturally a lighter value equally a pure hue, so it is used in the areas that are receiving low-cal. Darker values are enhanced using chocolate-brown and blackness, while lighter values are enhanced using white.

The Marks
The marks that are made are also of import. Marks tin can exist fabricated to mimic the texture of the leaves using small irregular circles. Cartoon each individual leaf would be counter-productive and is unnecessary. Remember, nosotros are creating an illusion based on how how our minds perceive the world effectually u.s.a.. These minor marks will suffice to create this illusion.
We will also demand to consider spaces that be in the canopy of the tree. The tendency is to overlook these openings, simply including them is incredibly of import.

Of class, these open up spaces provide more than opportunities for cartoon the branches that are visible, which add to the overall illusion that we are afterwards.
Other Tips
Similar with most colored pencil drawings, layering and building up colors is especially important. Most of the time, one application of color will not exist enough to create the required depth in colour to create a realistic appearance. Fortunately, colored pencils are easy to layer and blend nicely.
Start light when layering colors. Information technology is much easier to build up colors when initial layers are applied with a light hand early in the cartoon. Layering lightly in the early stages prevents build up of the binder which could hinder heavier applications applied after in the drawing process.
Exist patient. Colored pencils are a medium that requires patience. It is a fourth dimension consuming process to layer the pencils properly to create the required illusion. Besides often, beginner artists expect immediate results, when time should exist devoted to developing a colored pencil cartoon.

Source: https://thevirtualinstructor.com/how-to-draw-trees.html
Posted by: williamsalannow.blogspot.com
0 Response to "How To Draw Trees With Pen"
Post a Comment