

How To Create Web Application In Python Step By Step
Web Applications in Python
Getting Started with Django
![]()
Django is a python-based and open-sourced web framework that enables easy creation of database-driven websites. Some examples of sites that use Django include Instagram, Mozilla, and Bitbucket.
In this post, we will walk through the steps of building a simple web application with Django. Documentation for Django can be found here.
Let's get started!
The first thing we will need to do is make sure we have Django installed. To install Django, open up a terminal and execute the following pip command:
pip install django We can then display the version of Django:
python -m django --version The versio n I am using, at the time of this post, is 2.2.6. Now, let's create a new directory on our desktop called 'first_site':
          mkdir first_site
cd first_site
Let's create our Django project in our 'first_site' folder:
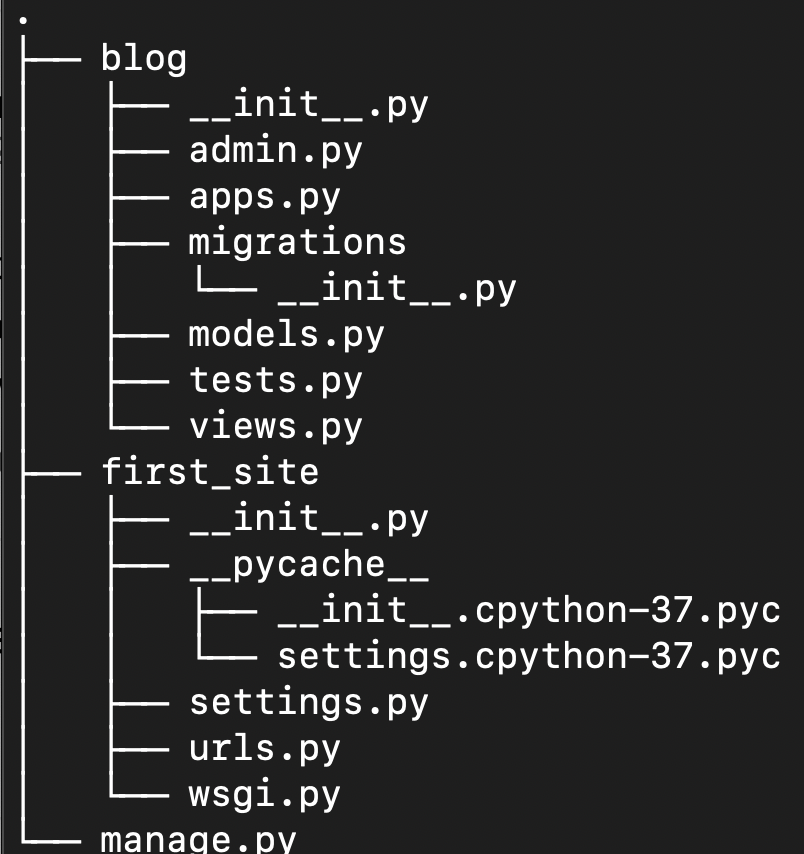
django-admin startproject first_site We can take a look at the structure of the files created and we see:

We have a 'manage.py' file and a Django project directory, 'first_site'. The 'manage.py' file is the command-line utility, which allows us to perform administrative tasks.
The '__init__.py' file is an empty file which tells python that our app is a python package. The 'setting.py' file allows us to change settings and configuration. The 'url.py' allows us to specify the mapping from urls to where we send the user. The 'wsgi.py' is used to allow communication between our server and web application.
Now, let's open the default website that comes with every new project. In our terminal we run:
python manage.py runserver We should see the following:

We see that our site is running. We can access our site at "http://127.0.0.1:8000/", which corresponds to our local computer. We should see the following:
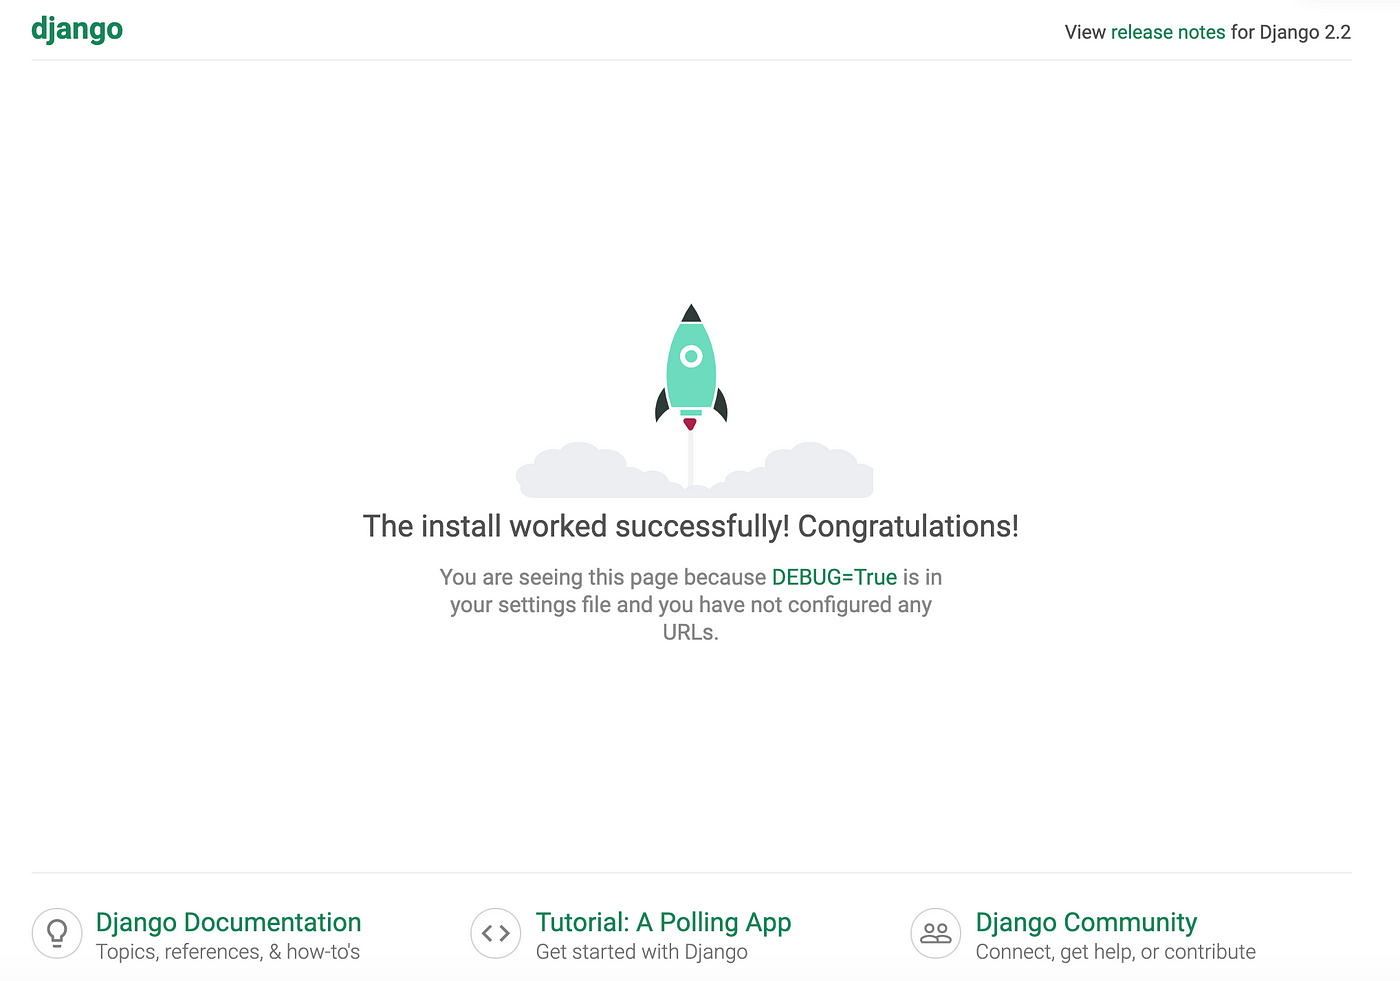
This is the default website that Django created for us. The thinking behind the Django framework is that upon creating a website project, which is itself an application, we can create additional applications within our web app. You can think of each application as being its own section on our site, such as blog section, store section, etc. What's nice about this framework is that upon creating an application you can reuse the code in subsequent web application.
We will proceed by creating a blog app for our website. First, press 'control' + 'C' to kill the server running our web app:
Next, to create our blog application we do the following:
python manage.py startapp blog We can look at our project structure upon creation of our new app:
Now, let's go into our blog directory and open the 'views.py' file. We should see the following:
from django.shortcuts import render # Create your views here.
Let's also import HttpResponse. Let's also create a new function called 'home', which will allow us to handle traffic from the home page of our blog:
          from django.shortcuts import render
from django.http import HttpResponse          def home(request):
            return HttpResponse('<h1>Blog Home</h1>')          # Create your views here.
Next, we need to map our url pattern to this 'view' function. We go to our blog app directory and create a new file call 'urls.py' In this file we copy and paste the following:
          from django.urls import path
from . import views          urlpatterns = [
path('', views.home, name='blog-home'),
]
Now we have a url path for our blog home page mapped to our home function in the views file.
For this to fully work, we need to modify our 'urls.py' module in main project directory, 'first_site'. This module tells our website which urls will send us to our blog app.
Let's open the 'urls.py' file in our 'first_site' directory:
          from django.contrib import admin
from django.urls import path          urlpatterns = [
path('admin/', admin.site.urls),
]
We see we have one route that gets mapped to our admin site urls. We now need to specify the routes that get mapped to our blog urls. We need to import the include function from django.urls and add an additional path for our blog url:
          from django.contrib import admin
from django.urls import path, include          urlpatterns = [
path('admin/', admin.site.urls),
path('blog/', include('blog.urls'))
]
Now let's try to run the server. I often come across the following error upon attempting to run the server:

To remedy this issue, execute:
ps -ef | grep python and use the following to kill the appropriate process:
kill -9 procees_id Now try running the server:
python manage.py runserver If we type, http://127.0.0.1:8000/blog/ we should see the following:
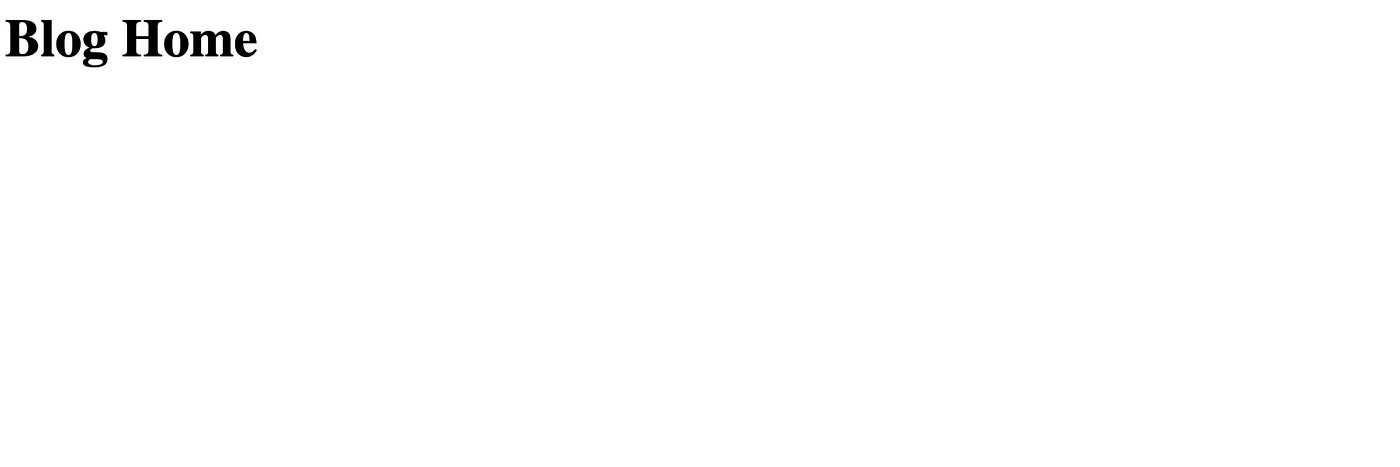
We can further edit the contents of blog home. Let's add a quote from one of my favorite novels, Infinite Jest, by David Foster Wallace:
          from django.shortcuts import render
from django.http import HttpResponse          def home(request):
            return HttpResponse('<h1>Blog Home</h1><p1>Everybody is identical in their secret unspoken belief that way deep down they are different from everyone else.</p1>')

We will also add an about page for our blog. In our 'views.py' module let's define a function called 'about':
          from django.shortcuts import render
from django.http import HttpResponse          def home(request):
            return HttpResponse('<h1>Blog Home</h1><p1>Everybody is identical in their secret unspoken belief that way deep down they are different from everyone else.</p1>')          def about(request):
            return HttpResponse('<h1>About Home</h1>')
Now let's add a new path for our about section in our 'urls.py' module in our blog app:
          from django.urls import path
from . import views          urlpatterns = [
path('', views.home, name='blog-home'),
path('about/', views.about, name='blog-about')
]
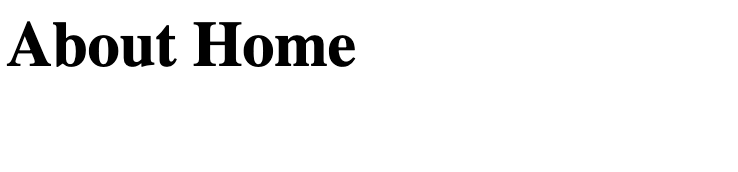
Now if we go to http://127.0.0.1:8000/blog/about we should see:
I'll stop here but feel free to play around with the contents of the blog home and about sections on our web application. Further, a great resource for learning more about Django is Corey Schafer's YouTube tutorials which can be found here.
CONCLUSIONS
To summarize, in this post we went over how to build web applications and define url routes using Django. First, we discussed the specific files generated upon creating a new web application with Django. Then we created a blog application within our project and defined view functions, which allow us to specify what the user sees. We also showed how to add an additional url route and view within our blog application. I hope you found this post useful/interesting. Thank you for reading!
How To Create Web Application In Python Step By Step
Source: https://towardsdatascience.com/web-applications-in-python-a1a7edcb5b9e
Posted by: williamsalannow.blogspot.com
0 Response to "How To Create Web Application In Python Step By Step"
Post a Comment